Building
1. space formed by [position X[-3] Y[-24] Z[-8]] and [position X[0] Y[-22] Z[-5]]

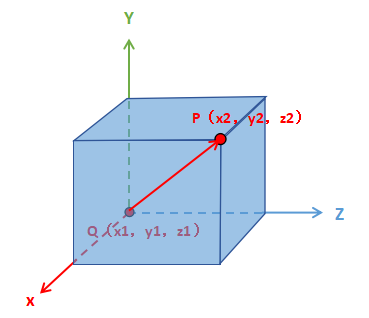
It is a space formed by two positions. The size of this space depends on the difference between the X, Y and Z coordinates of these two positions.
See the picture below. The blue area is the space formed by Q(X1, Y1, Z1) and P(X2, Y2, Z2).
2. copy and rotate 90° anticlockwise all cubes in [space formed by [position X[-3] Y[-24] Z[-8]] and [position X[0] Y[-22] Z[-5]]] [0] times to [pointer's adjacent position]

copy and rotate 90° anticlockwise all cubes in [space formed by [position X[-3] Y[-24] Z[-8]] and [position X[0] Y[-22] Z[-5]]] [0] times to [pointer's adjacent position]
For example:
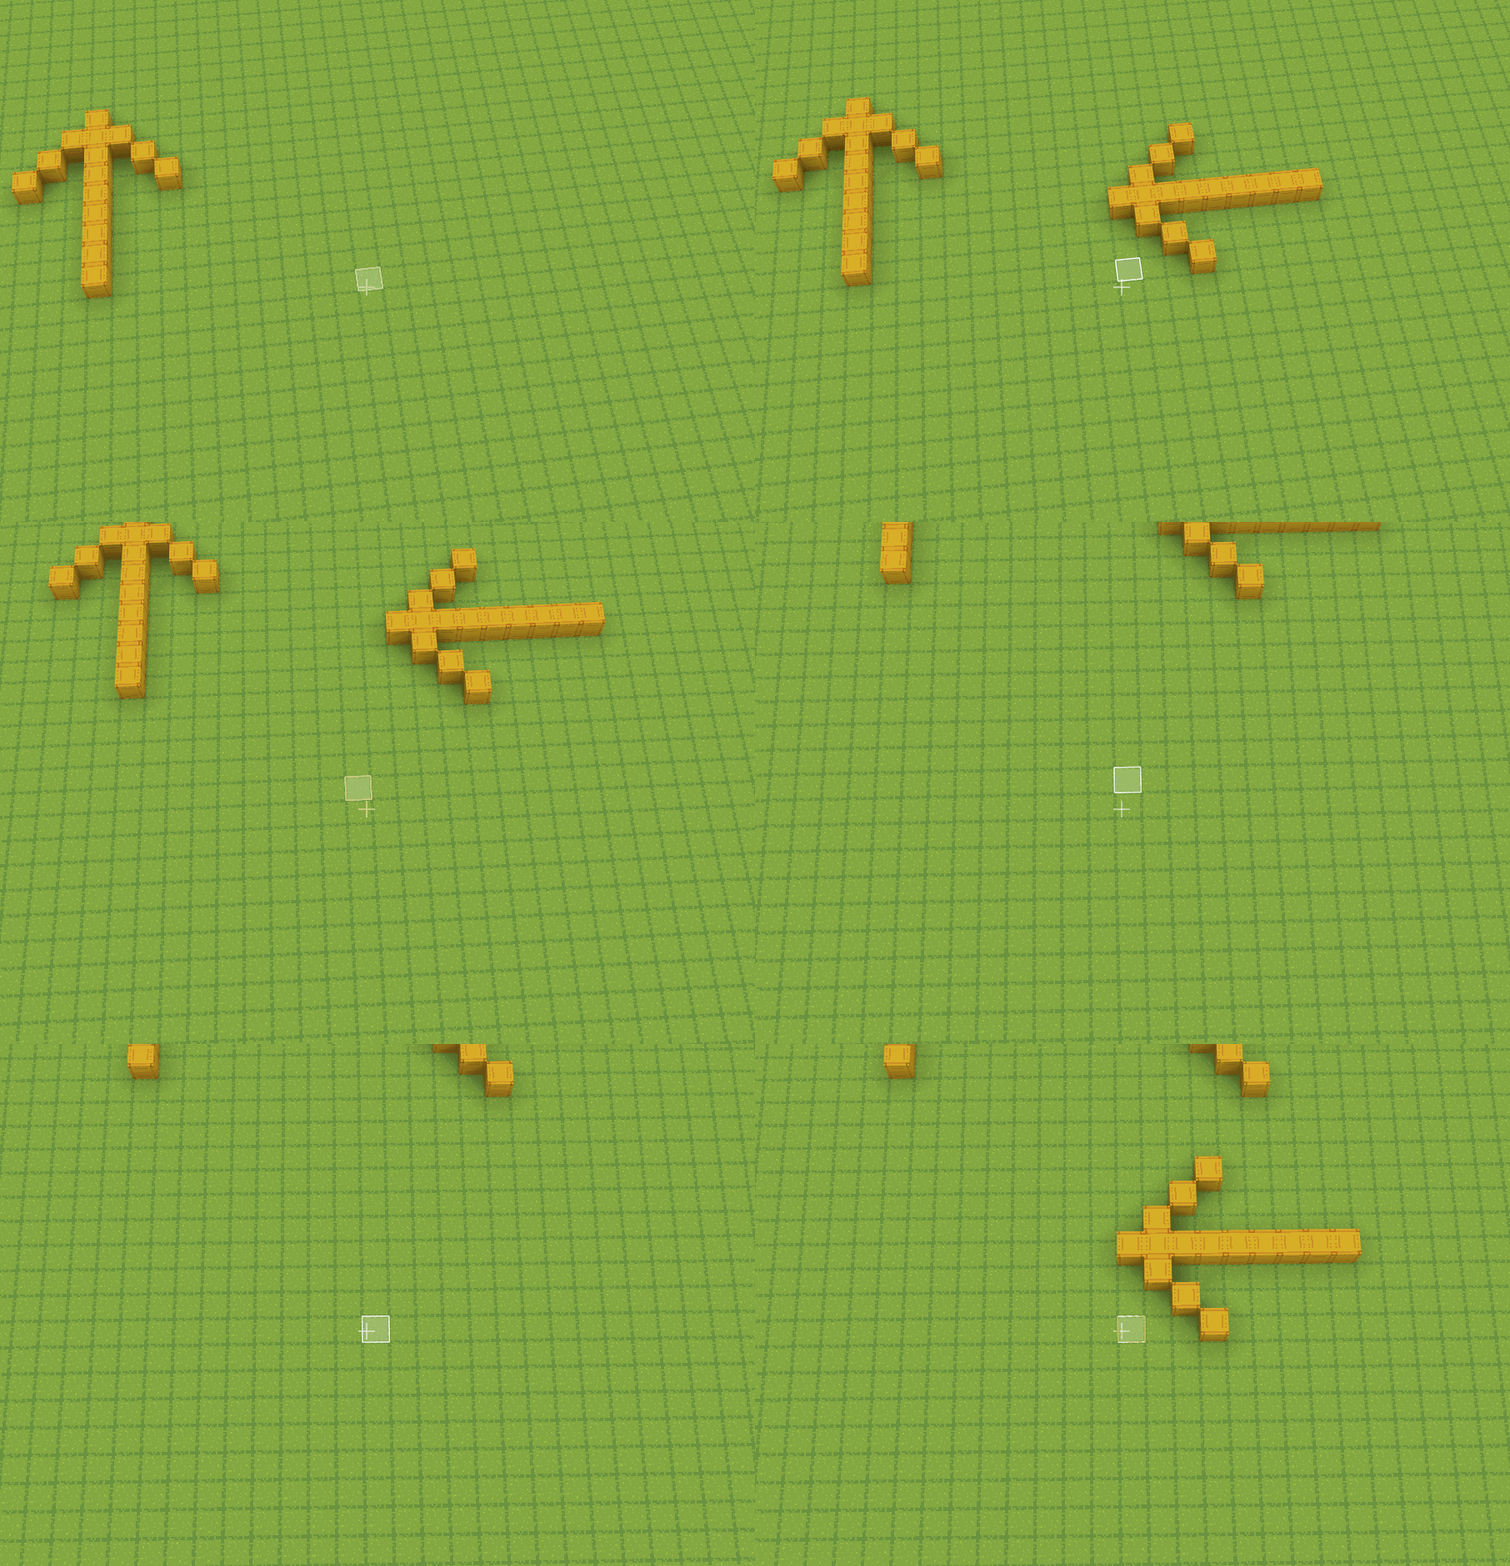
Run the blocks below. When key I is released, all cubes in the space between position [X:-3, Y:-29, Z:-12] and position [X:-11, Y:-29, Z:-6] (the "↑" in picture) will be copied, rotated 90° anticlockwise around Y-axis once (the "←" in the picture), and "paste" to pointer's adjacent position.

3. set cube at [pointer's position] as [cube [ ]]

Set cube material of a certain position.
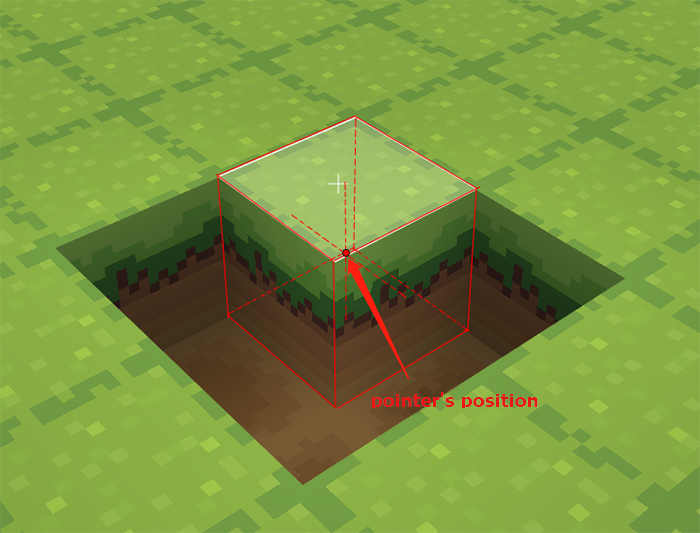
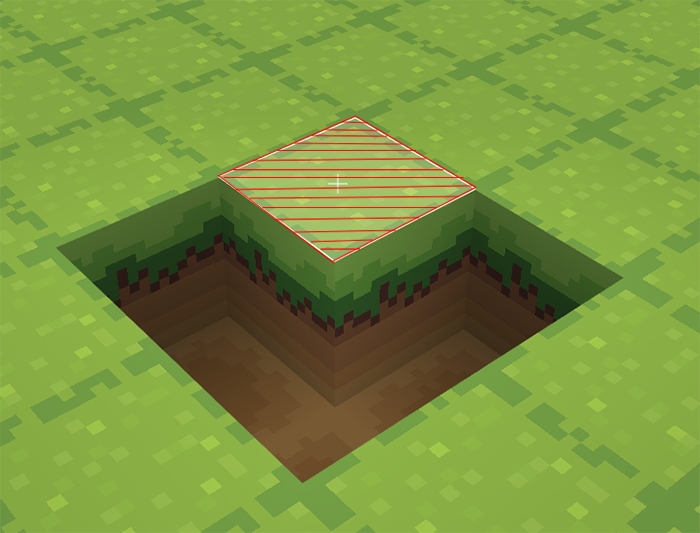
Please note: you can only replace, not create, cubes with this block. Please note the difference between [pointer's position] and [pointer's adjacent position]. Pointer's position refers to the central point of a cube. For example, as the figure shows, if you "set cube at [pointer's position] as [cube [ice]]", the system will replace the red-framed cube with ice cube rather than create an ice cube on the white-framed surface.
4. put cube [cube [ ]] at pointer's position

Put certain cube at the pointer's position.
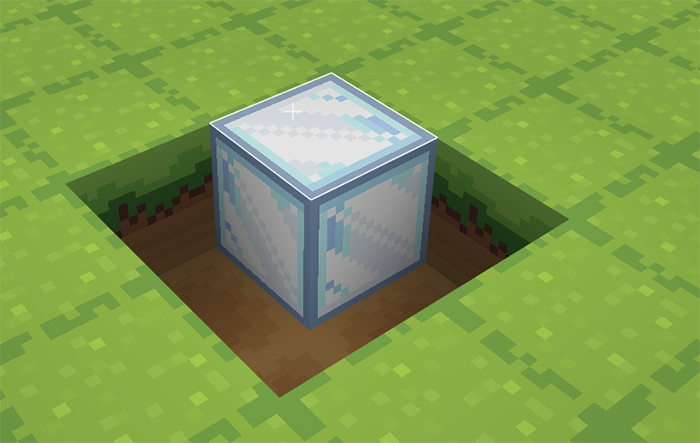
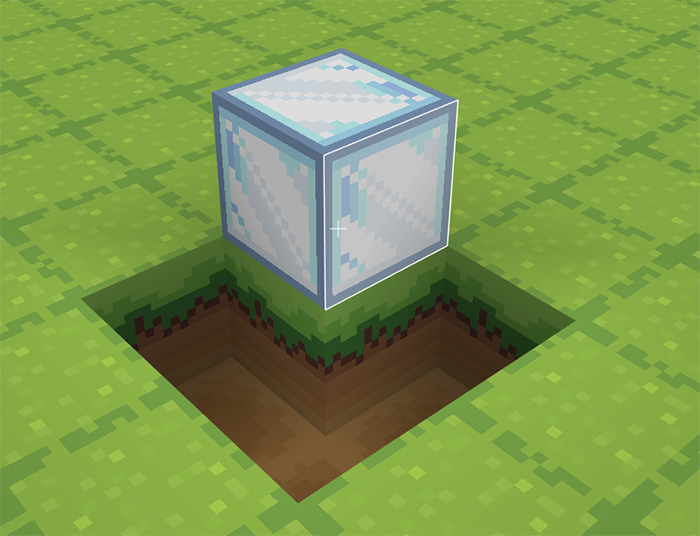
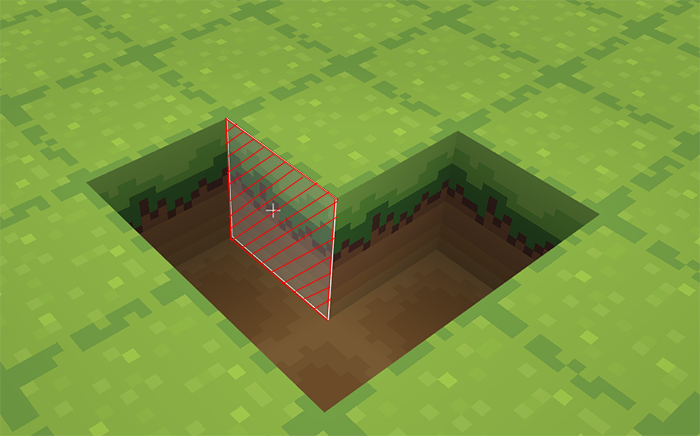
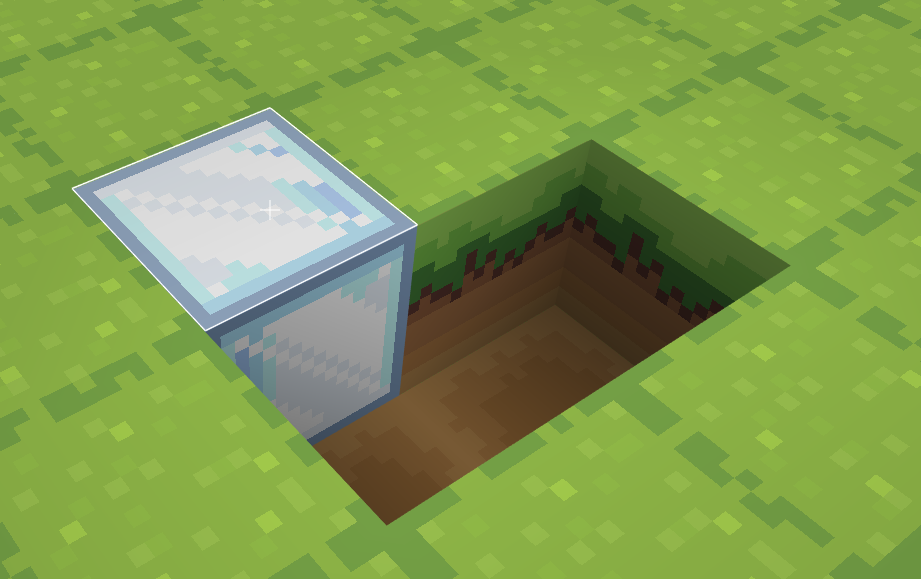
Please note that the cube will be put on the pointed surface. For example, if you select the up side of a cube, then the system will put a cube on the up side of the selected cube; if you select the left side of a cube, then the system will put a cube to the left of the selected cube.
As the figure below shows, to put cube [cube [ice]] at the pointer's position means to put cube on the white-framed surface of the selected cube.
- If you select the left side of the cube, then the system will put a cube to the left of the selected cube.
5. break [pointer's position] cube

Break the cube at a certain position.
Please note: the broken cube will be replaced by an [air] cube instead of disappearing.
6. set drone's position to [player's position]

Set the drone's position to a certain position or the drone's default position will be infinite (X: 999, Y: 999, Z:999).
You can check the drone's position by pressing Ctrl+F3.

7. move drone [forward] by [1] units

Move the drone [forward/backward/left/right/up/down/along X-axis/along Y-axis/along Z-axis] by certain units. The value here can be negative, which means the opposite direction. For example, "move forward by 1 unit" is the same as "move backward by -1 unit."
Please Note:
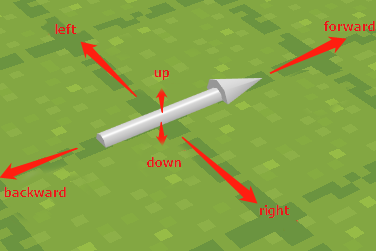
(1). Move [forward/backward/left/right/up/down]: the drone contains both position and direction, so the "forward/backward/left/right/up/down" here means the direction of drone. As the picture shows, "forward" means the front of the arrow; "backward" means the back of the arrow; "left" means the left of the arrow; "up" means the up side of the the arrow and so on.
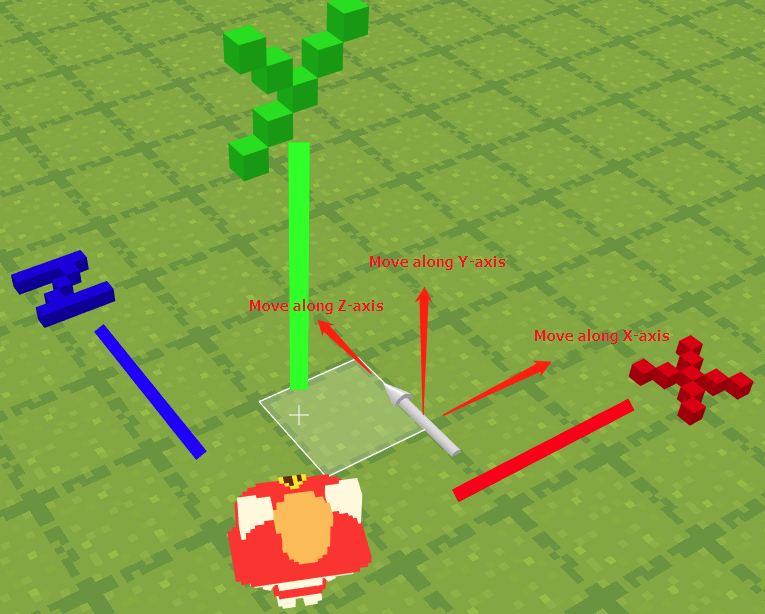
(2) Move [along X-axis/Y-axis/Z-axis]: the "X-axis/Y-axis/Z-axis" here refers to the direction of coordinates and is independent of the facing direction of the drone. If you want to move the drone along the opposite direction of X-axis, just add a negative sign before the value.
8. rotate drone around [X-axis] by [90] degrees

- Rotate the drone around [X-axis/Y-axis/Z-axis] by certain degrees from the current orientation. This block can be used to change the facing direction of the drone.
9. rotate drone around [X-axis] to [90] degrees

No matter where the drone points, its direction will be set to certain degrees.
Please note: the 0 degree of X-axis/Y-axis/Z-axis is the default direction of the drone (the positive direction of the coordinates).
10. place model [?] at position [X [1] Y [15] Z [1]], scale [1] [with] collisions [with]animation [1] sec(s) per frame

Place the model created in 3D Builder at a certain position and set its scale, collisions, animation and time for per frame.
Arguments:
(1). Scale: scale means the size of model. The default size of model is 111 cube. If you set the scale to 2, the size of the placed model will be 222 cube.
(2). With/without collisions: set the model whether it can be "passed through". With collisions, the model is like a cube that can block players; else, players can pass through the model.
(3). With/without animation: players need to set multi-frame animation in 3D Builder (please refer to the introduction of 3D Builder).
(4). [ ] sec(s) per frame: players can set the playing time for each frame.
How to create models in 3D Builder??
11. set model [?] as entity at [position X [1] Y [15] Z [1] ], scale [1] [with] collisions [with] physics

Set the model created in 3D Builder as entity and place it at a certain position. Players can set the model's scale and select [with/without] collisions and [with/without] physics. With collisions, the model can block players and cannot be passed through. With physics, the model has gravity, so it will fall to the ground if it is in the air.
Differences between model and entity:
3D objects created in 3D Builder can be categorized into two types, that is, "model" and "entity".
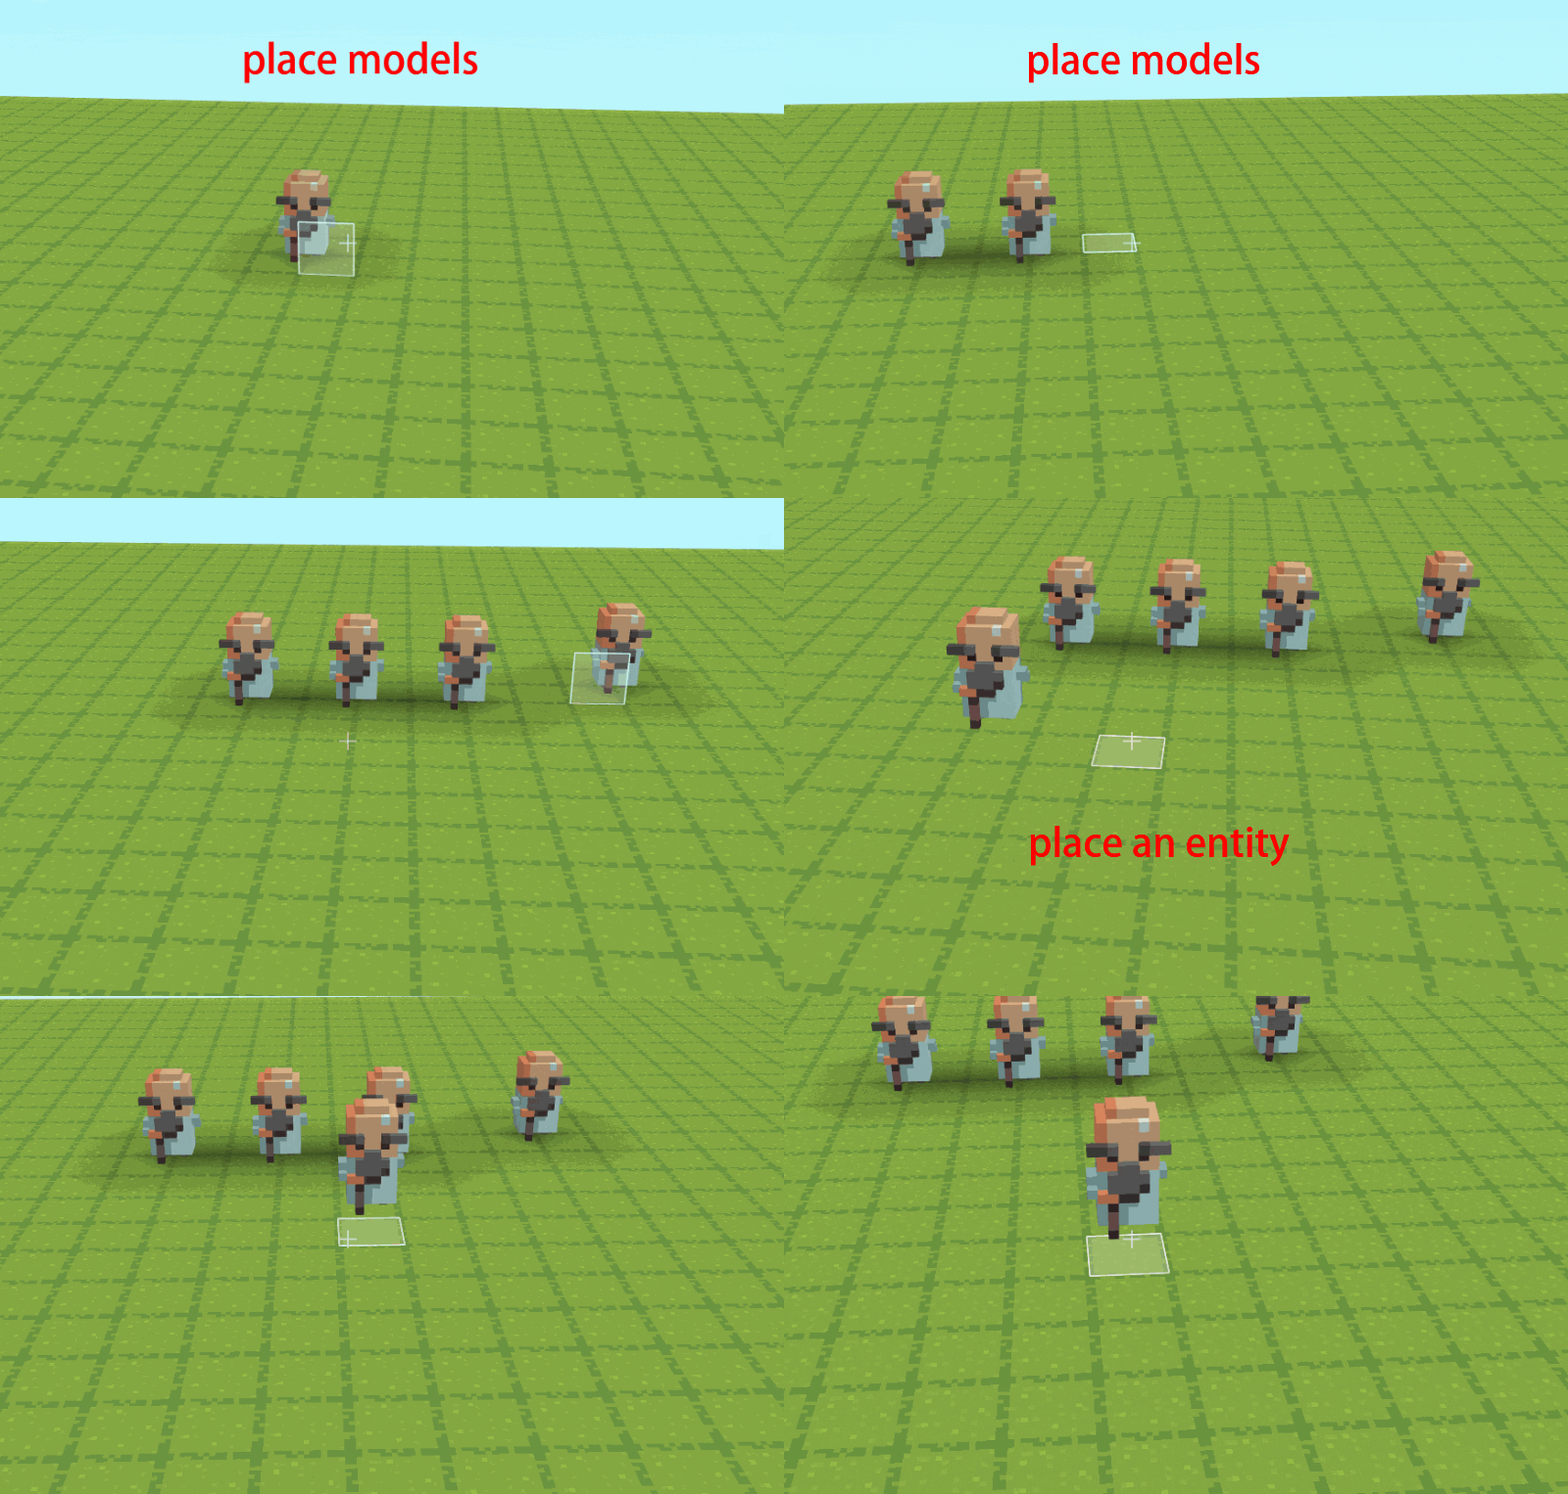
(1). Model: if players do not use "set model [ ] as entity..." block, then the object will be a model. There can be multiple models in the world at the same time. Blocks related to entities cannot work with models. Models cannot move but have animation effects, and they are more suitable to be decorations.
(2). Entity: players need to use "set model [ ] as entity..." block to set models as entities. When a model is set as entity, it is an unique object in the world and can use blocks related to entities. If a player place an entity at a new position, the original one will disappear (each entity is an unique object). Entities can move but cannot have animation effects, and they are more suitable to be moving objects such as walking enemies and moving cars.
12. break entity [?]

Break entity [entity you selected]. The "break cube" block cannot break entities. Please use this block if you want to break entities.
Please note: players can still use "set model [?] as entity at..." to place the entity again.
13. move entity [?] [forward] by [8] units in [5] sec(s)

With this block, the selected entity can move forward in certain time at a constant speed(enter values between -64 and 64, two decimal places at most ).
Please note:
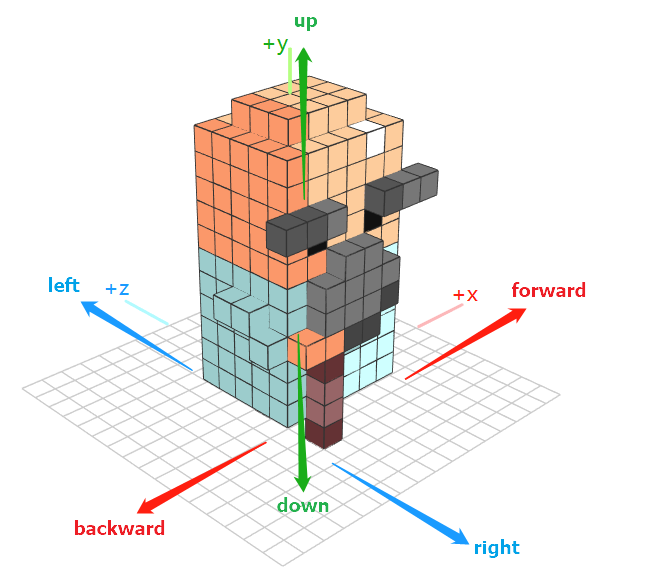
(1). [forward/backward/left/right/up/down]: the directions here refer to the coordinates of the model. Players can check the coordinates direction of the model in 3D Builder. The positive direction of X-axis is forward, while the negative direction is backward; the positive direction of Z-axis is left and the negative direction is right; the positive direction of Y-axis is up and the negative direction is down.
(2). [X-axis/Y-axis/Z-axis] refers to the coordinates of the world.
For example:
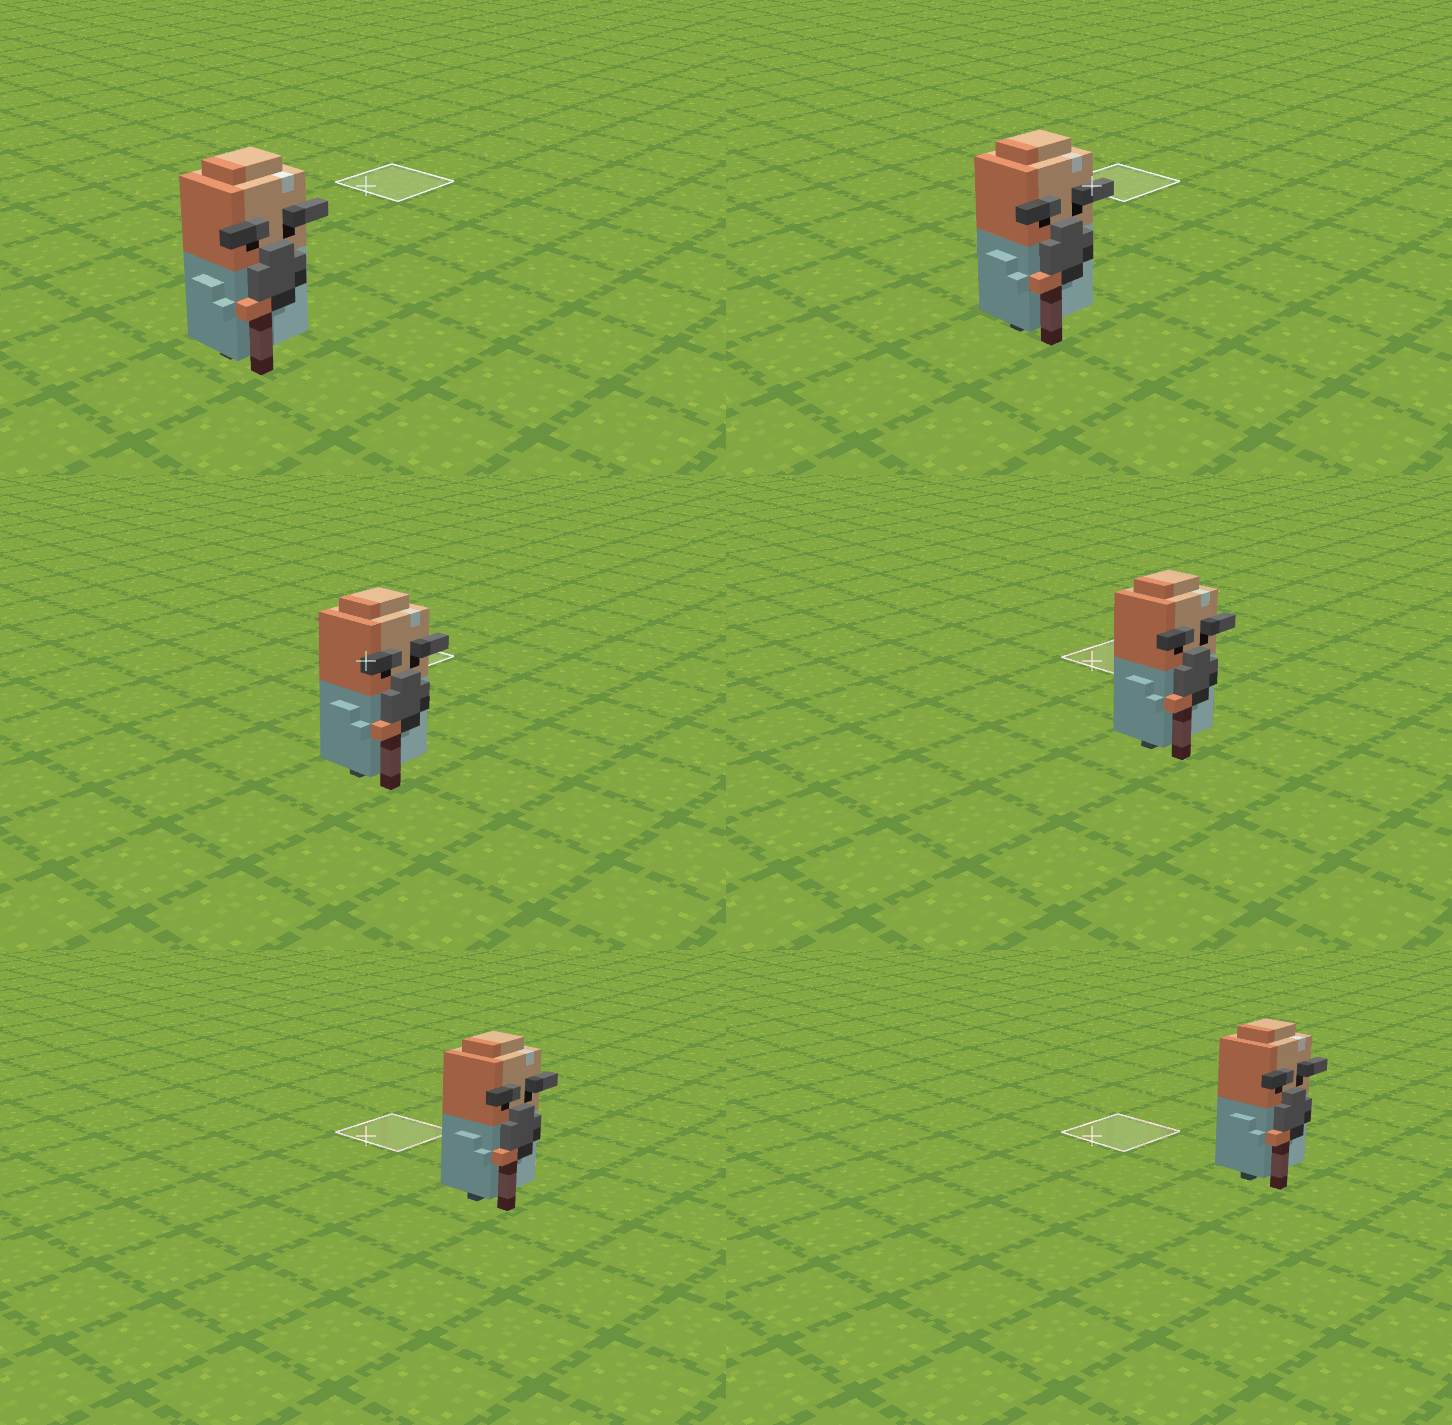
Run the below script: when key i released, entity [old man] will move forward (along the positive direction of X-axis) by [4] units in [2] seconds at a constant speed.

14. move entity [?] to [position X [1] Y [15] Z [1]] in [8] sec(s)

Move the selected entity to a certain position in input time.
Please note that this block is different from "move player to a certain position" block as the latter means to teleport the player while the former means to move the entity continuously and smoothly.
For example:
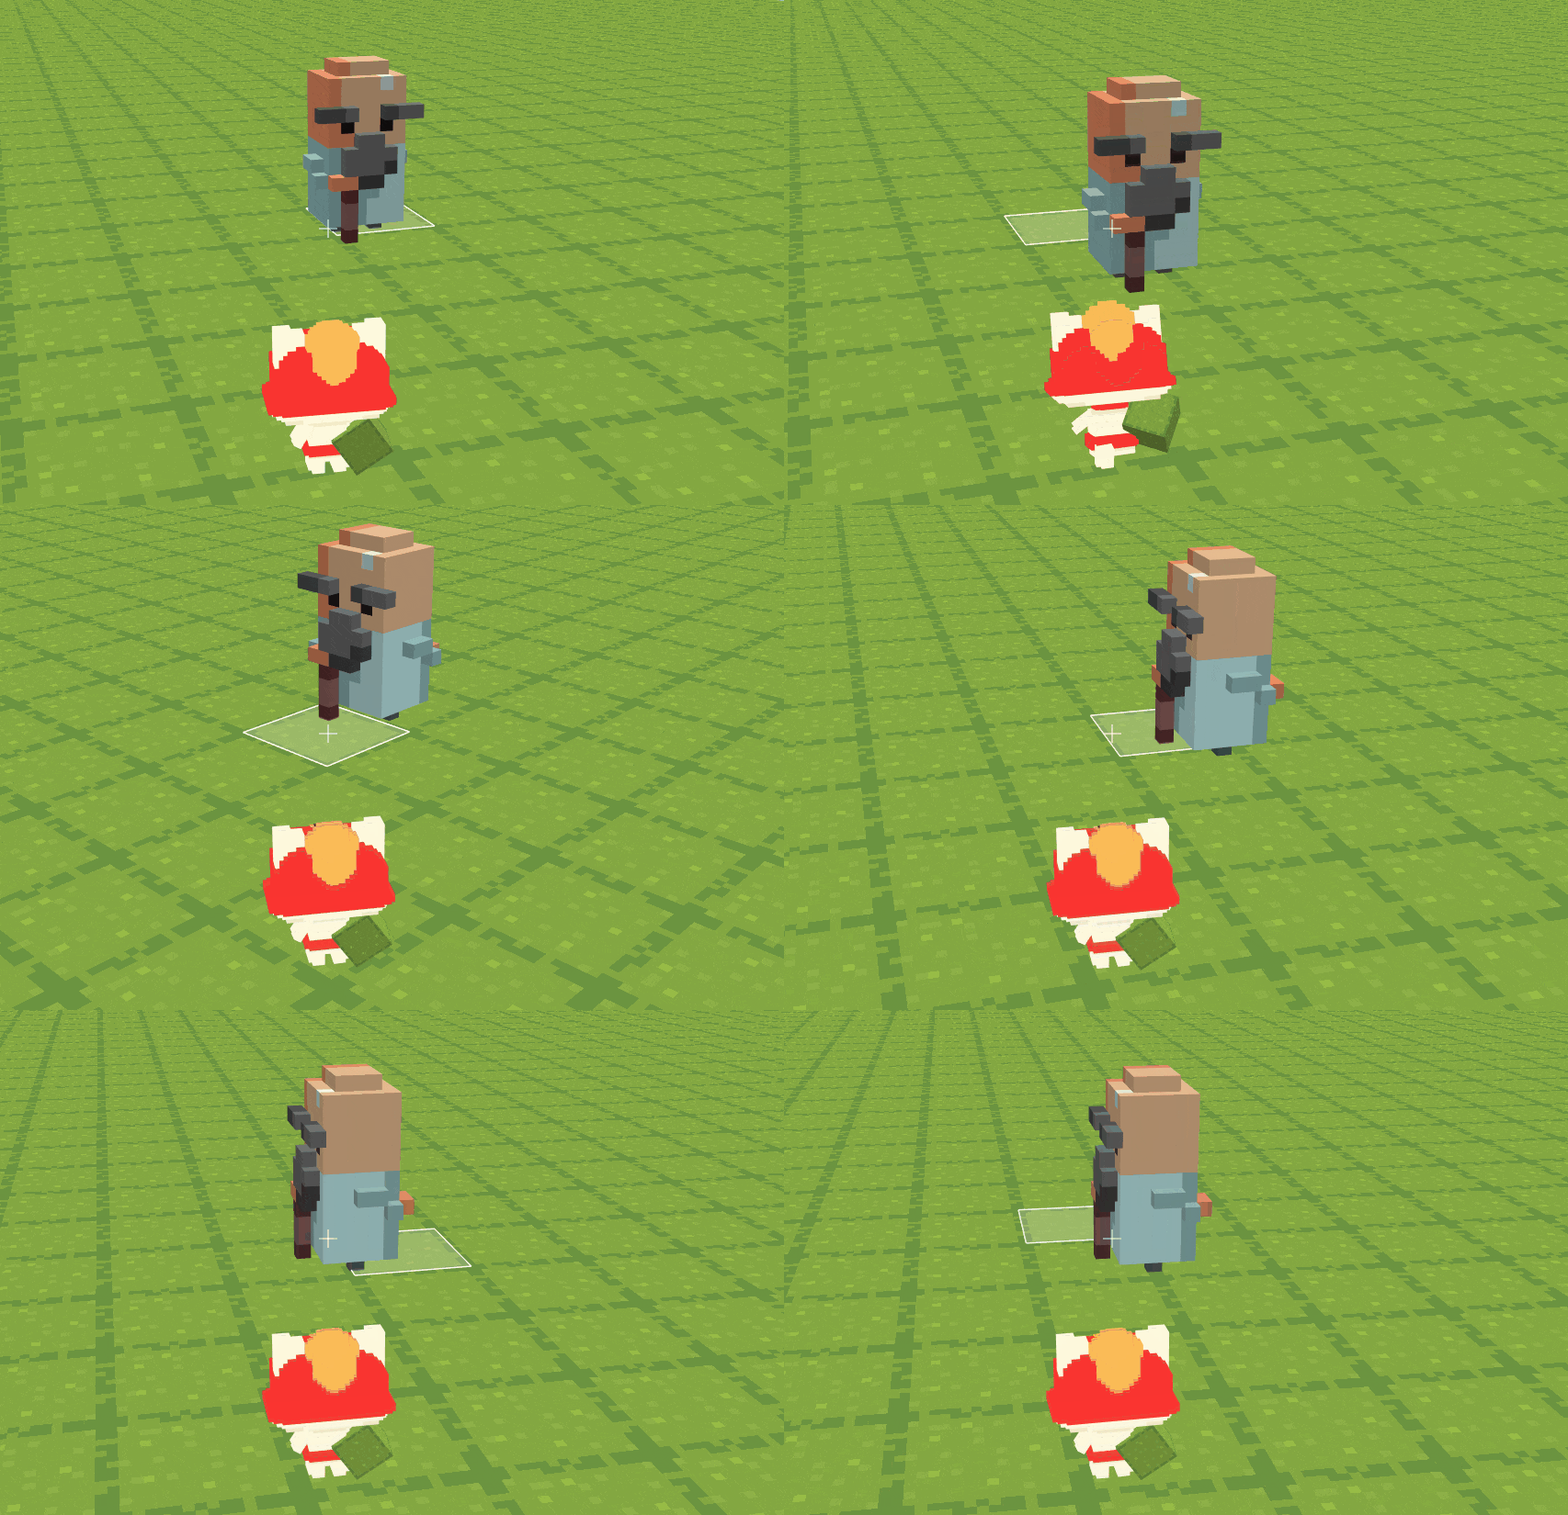
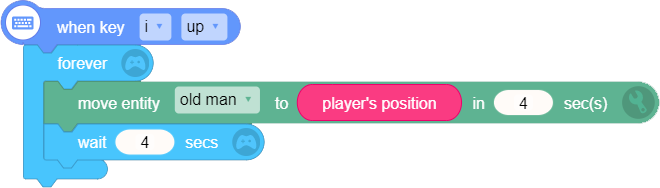
Run the script below: when key i released, entity [old man] will move to [player's position] in [4] seconds. Please note that the player's position here refers to the player's position when key i is released. Even if the player's position has changed later, the entity will stop at the player's original position.

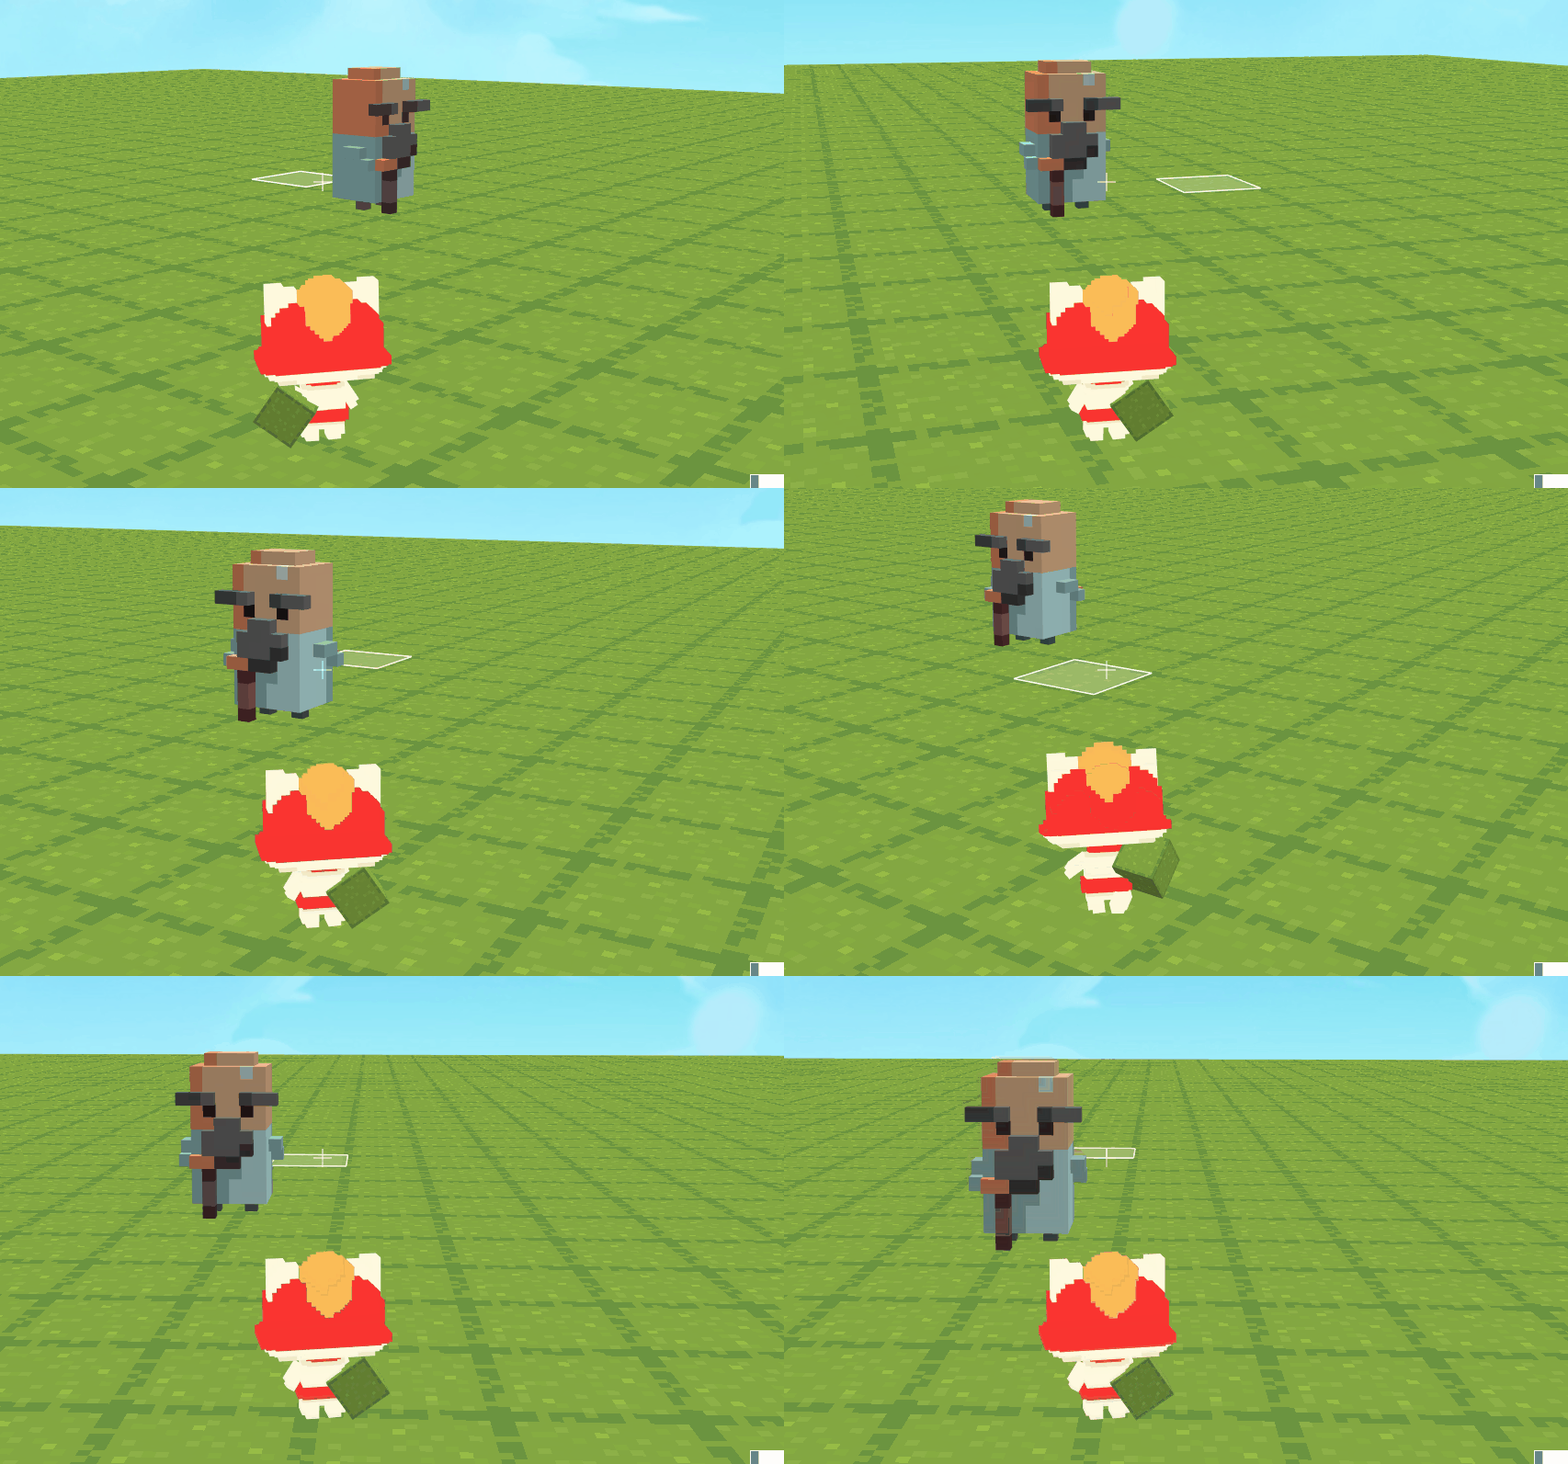
If you want to make the entity follow the player all the time, try the "forever" block.
15. set the acceleration of entity [?] along [X-axis] to [5]

Set the acceleration of the selected entity along [X-axis/Y-axis/Z-axis] to [input value]. This block can be used to make the entity do variable motion along a certain axis.
Acceleration: The rate of change of velocity with respect to time. Acceleration is a physical term describing an object's rate of change of velocity.
For example:
Run the script below: when the player releases key i, the entity [old man] will get an acceleration along X-axis and do variable motion. The entity will speed up, then slow down, and finally stop.

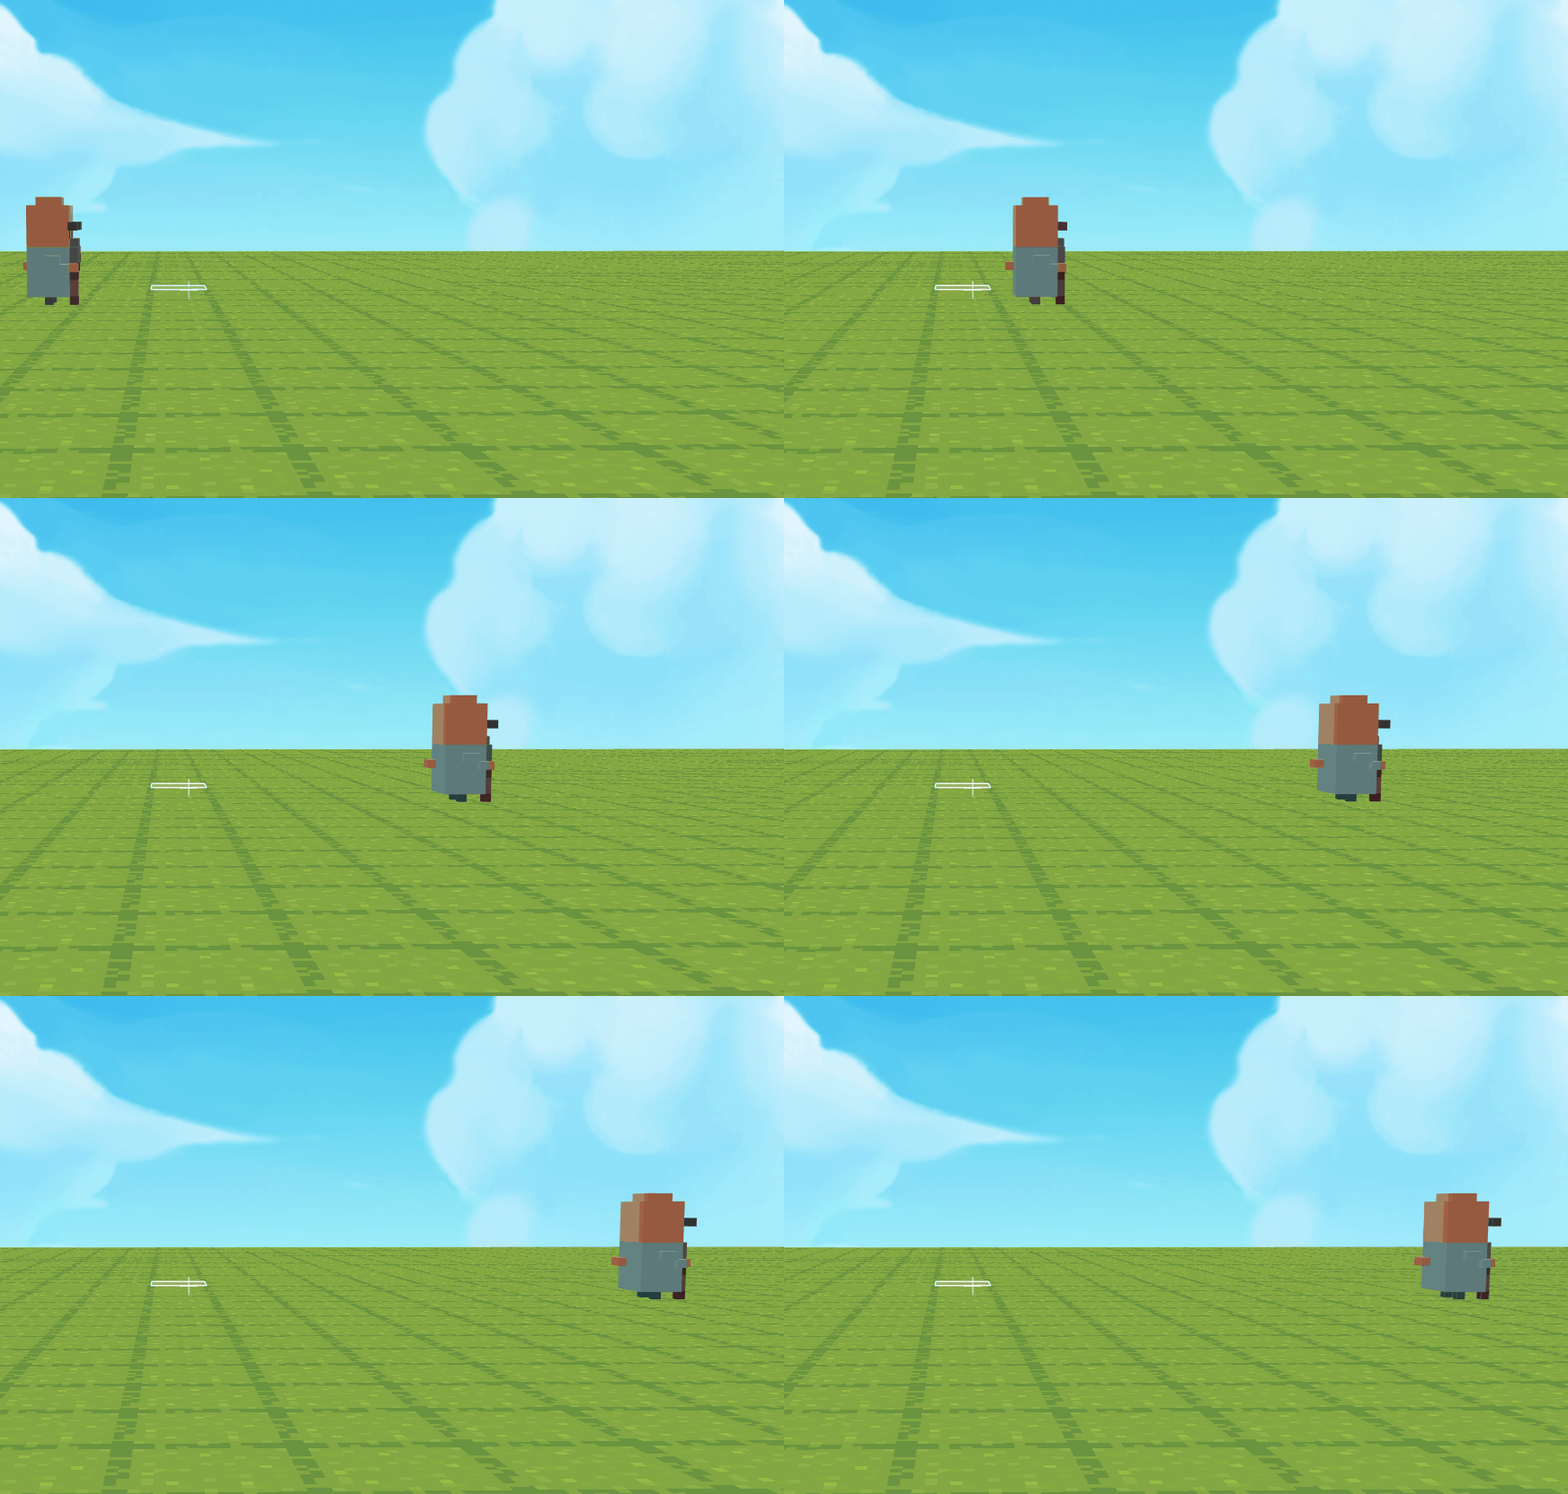
16. rotate entity [?] around [X-axis] by [60] degrees

Rotate the selected entity around [X-axis/Y-axis/Z-axis] by [input value] degrees. The center of rotation is the center of the entity.
For example:
Run the script below, then when the player presses key i, the entity will rotate around [Y-axis] by [90] degrees.

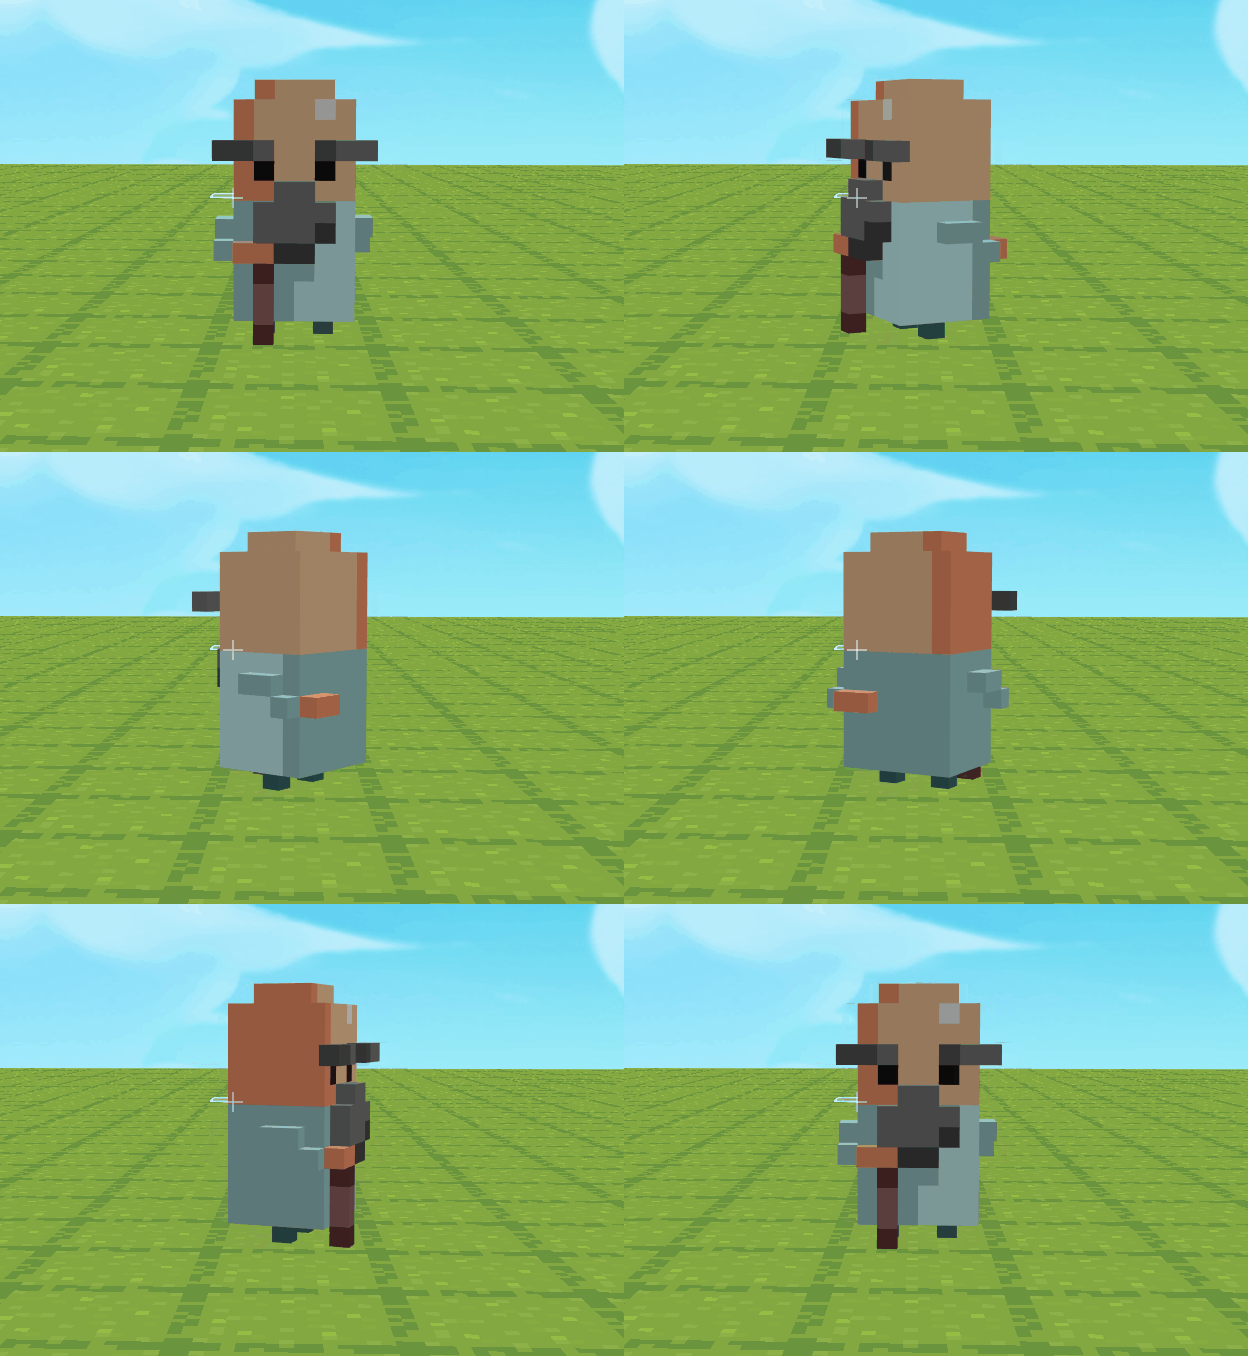
17. rotate entity [?] around [X-axis] to [60] degrees

- Rotate the selected entity around the [X-axis/Y-axis/Z-axis] of the world to certain degrees.
18. set broken cube's particle effect as [random]

Set the effect when a cube is broken. The default effect is blocksmoke.
Please note: the "broken cube" here refers to the cube in "break [position] cube". You cannot set the particle effect of cubes broken in other ways.
19. build cuboid at[pointer's position] X [6] Z [5] Y [12] with material [ ]

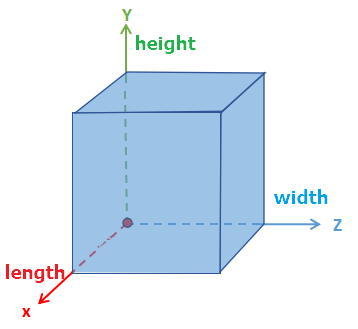
Build cuboid at a certain position with certain material. The length, width, and height of the cuboid refers to the values of X, Z, Y.
The relationship between the length, width, height of the cuboid and the values of X, Z, Y is fixed. If you set the X, Z, Y to 6, 5, 12, then, the cuboid's length along X will be 6, along Z will be 5, and along Y will be12.
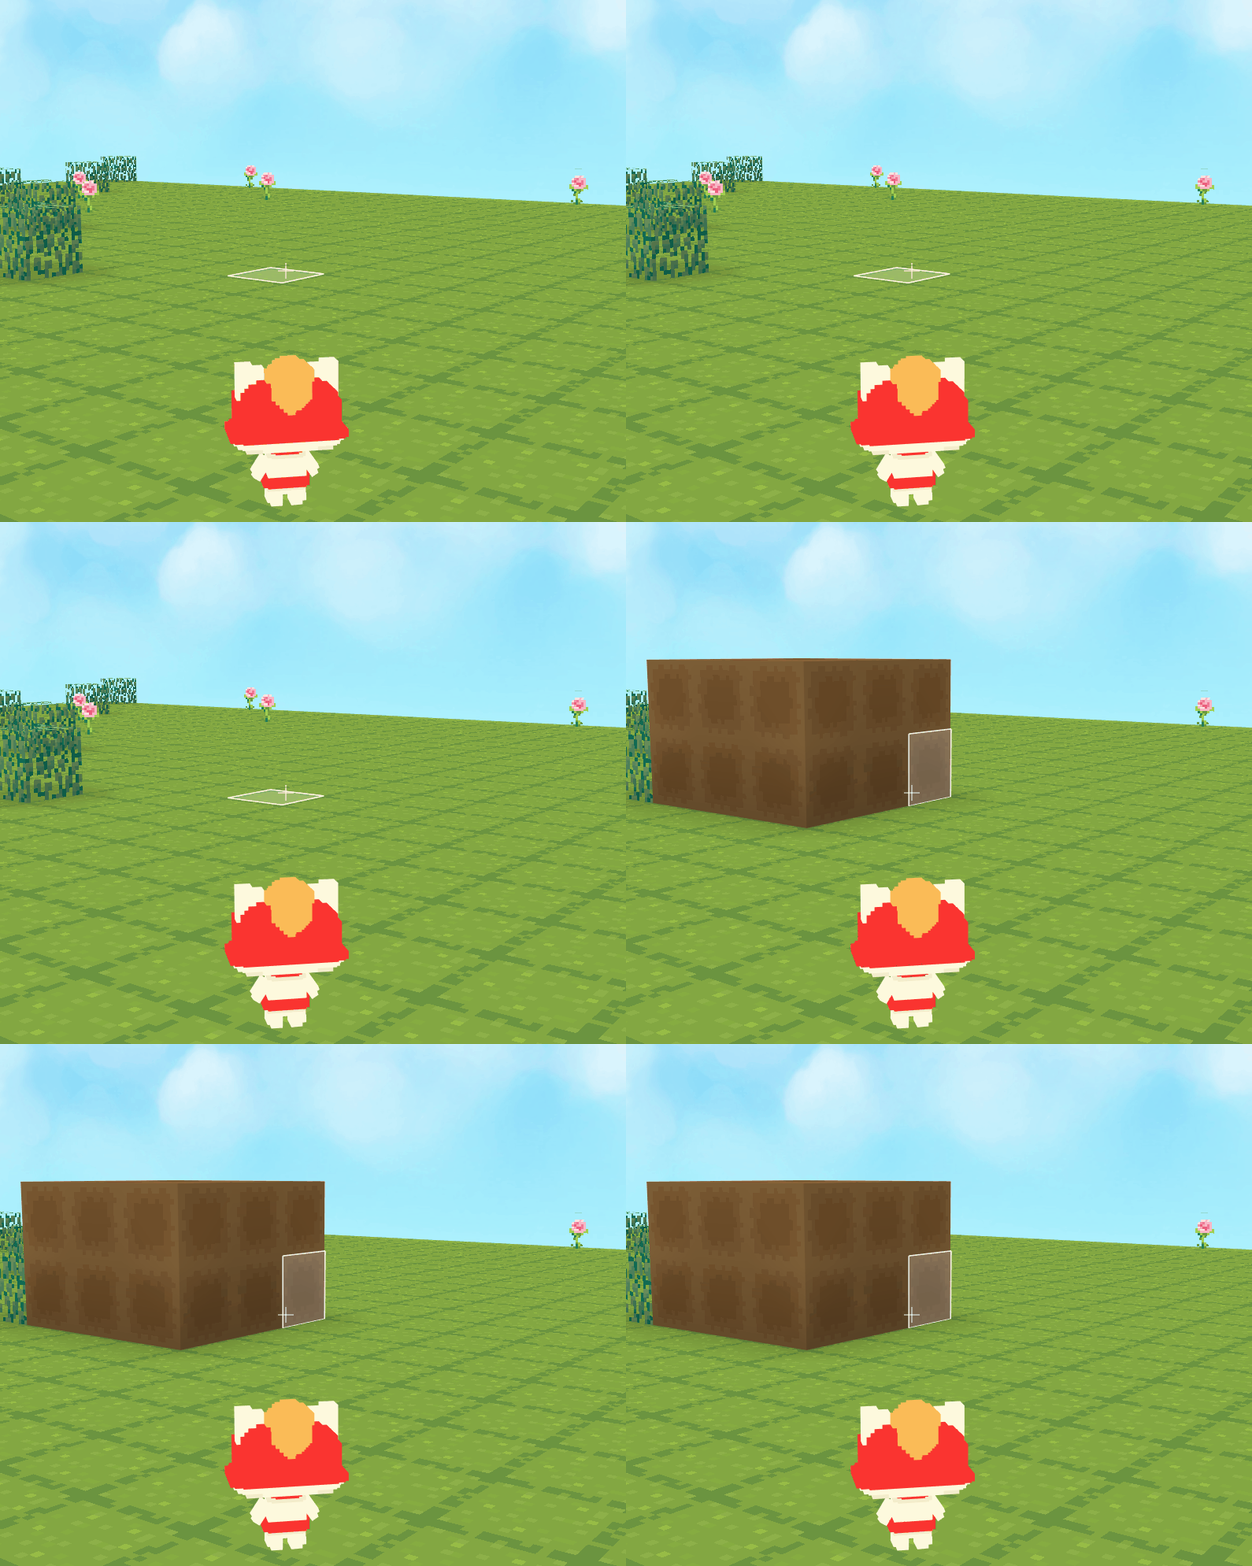
- Please note: if you choose to "build cuboid at pointer's position with X [?] Y [?] Z [?] material [ ]", you will replace the cube at the pointer's position with the new-built cuboid rather than build the cuboid "on" the pointer's position.
20. build cuboid at [pointer's position] with length [6] width [12] height [5] material [ ]

- Build cuboid at a certain position with certain material. Here the "length/width/height" refers to the facing direction of the player. If the player faces the positive direction of Z-axis, then the length stretches along the positive direction of Z-axis, the width stretches along the positive direction of X-axis, and the height stretches along the positive direction of Y-axis.
21. build sphere at [position X [1] Y [5] Z [1]] with radius [5] material [ ]

- Build sphere at a certain position with certain radius and material. The specified position will be the center of the sphere.
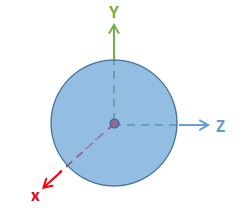
22. build cylinder at [pointer's position] with raidius [5] height [5] material [ ]

- Build cylinder at a certain position with certain material. Players can set the cylinder's radius and height.
23. replace all [natural cube [ ] ] with [building [ ] ]

- Replace certain cubes in the world with other cubes.